Playhouse Makeover - Easy DIY for moms
Hey fellow moms & dads! Grab a cup of coffee and join me as I spill the beans on my latest adventure—ok just kidding, I did this last summer and only am now getting the time to share about it.
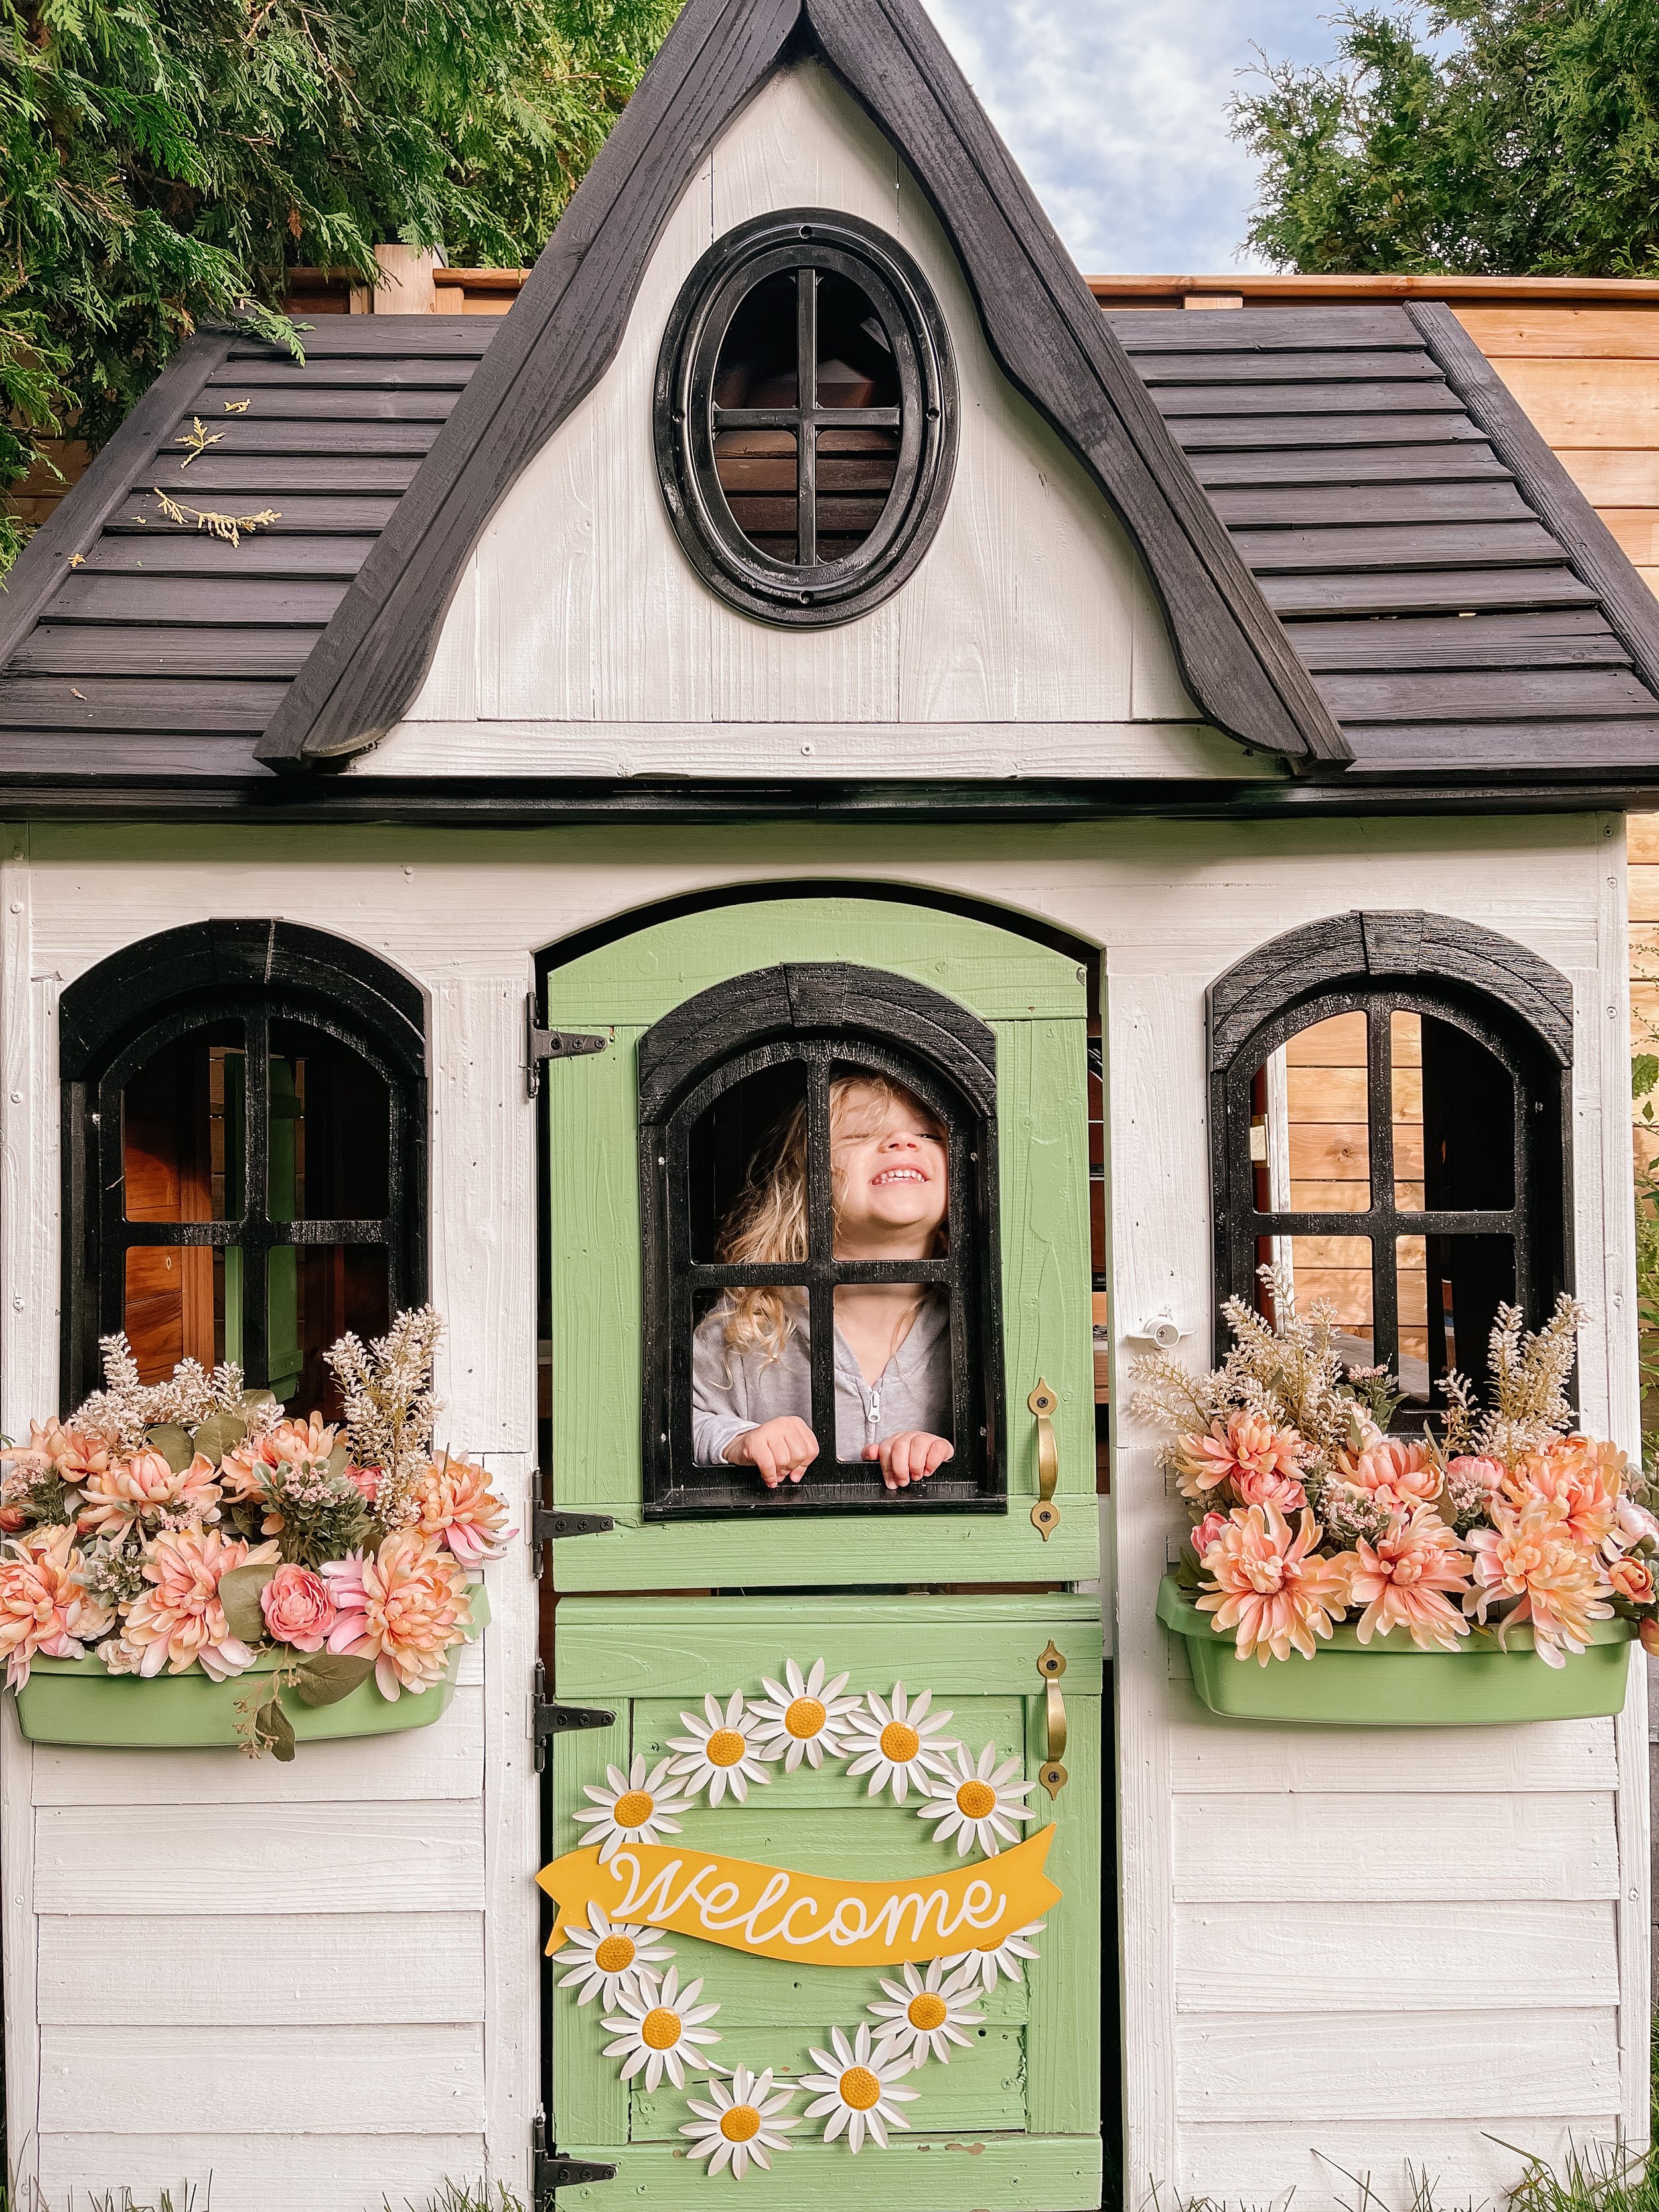
Introducing the ultimate playhouse makeover for your little rascals! As moms, we're always on the lookout for ways to make our kids' lives more magical and memorable. So, armed with paintbrushes, faux florals, and a dash of creativity, I embarked on a DIY journey to transform their outdoor playhouse into a whimsical wonderland. Trust me, the joy and excitement on my kids' faces were worth every drop of sweat!
If you've ever felt hesitant about taking on a DIY project, fear not as although this playhouse transformation took several weeks, as a busy mom I tackled it in bite-sized pieces - sometimes just 15 minutes a day! I'm here to show you that even with a jam-packed schedule, you can sprinkle a little magic into your kids' lives. So, let's dive into the journey of turning a simple playhouse into an imaginative dream, one step at a time.
Supplies
Before we embark on this creative endeavor, let's gather our supplies. Here's a handy list of what you'll need for this DIY playhouse renovation. To make life simpler, I linked most items below on my storefront so you can easily shop the tools you need for this project.
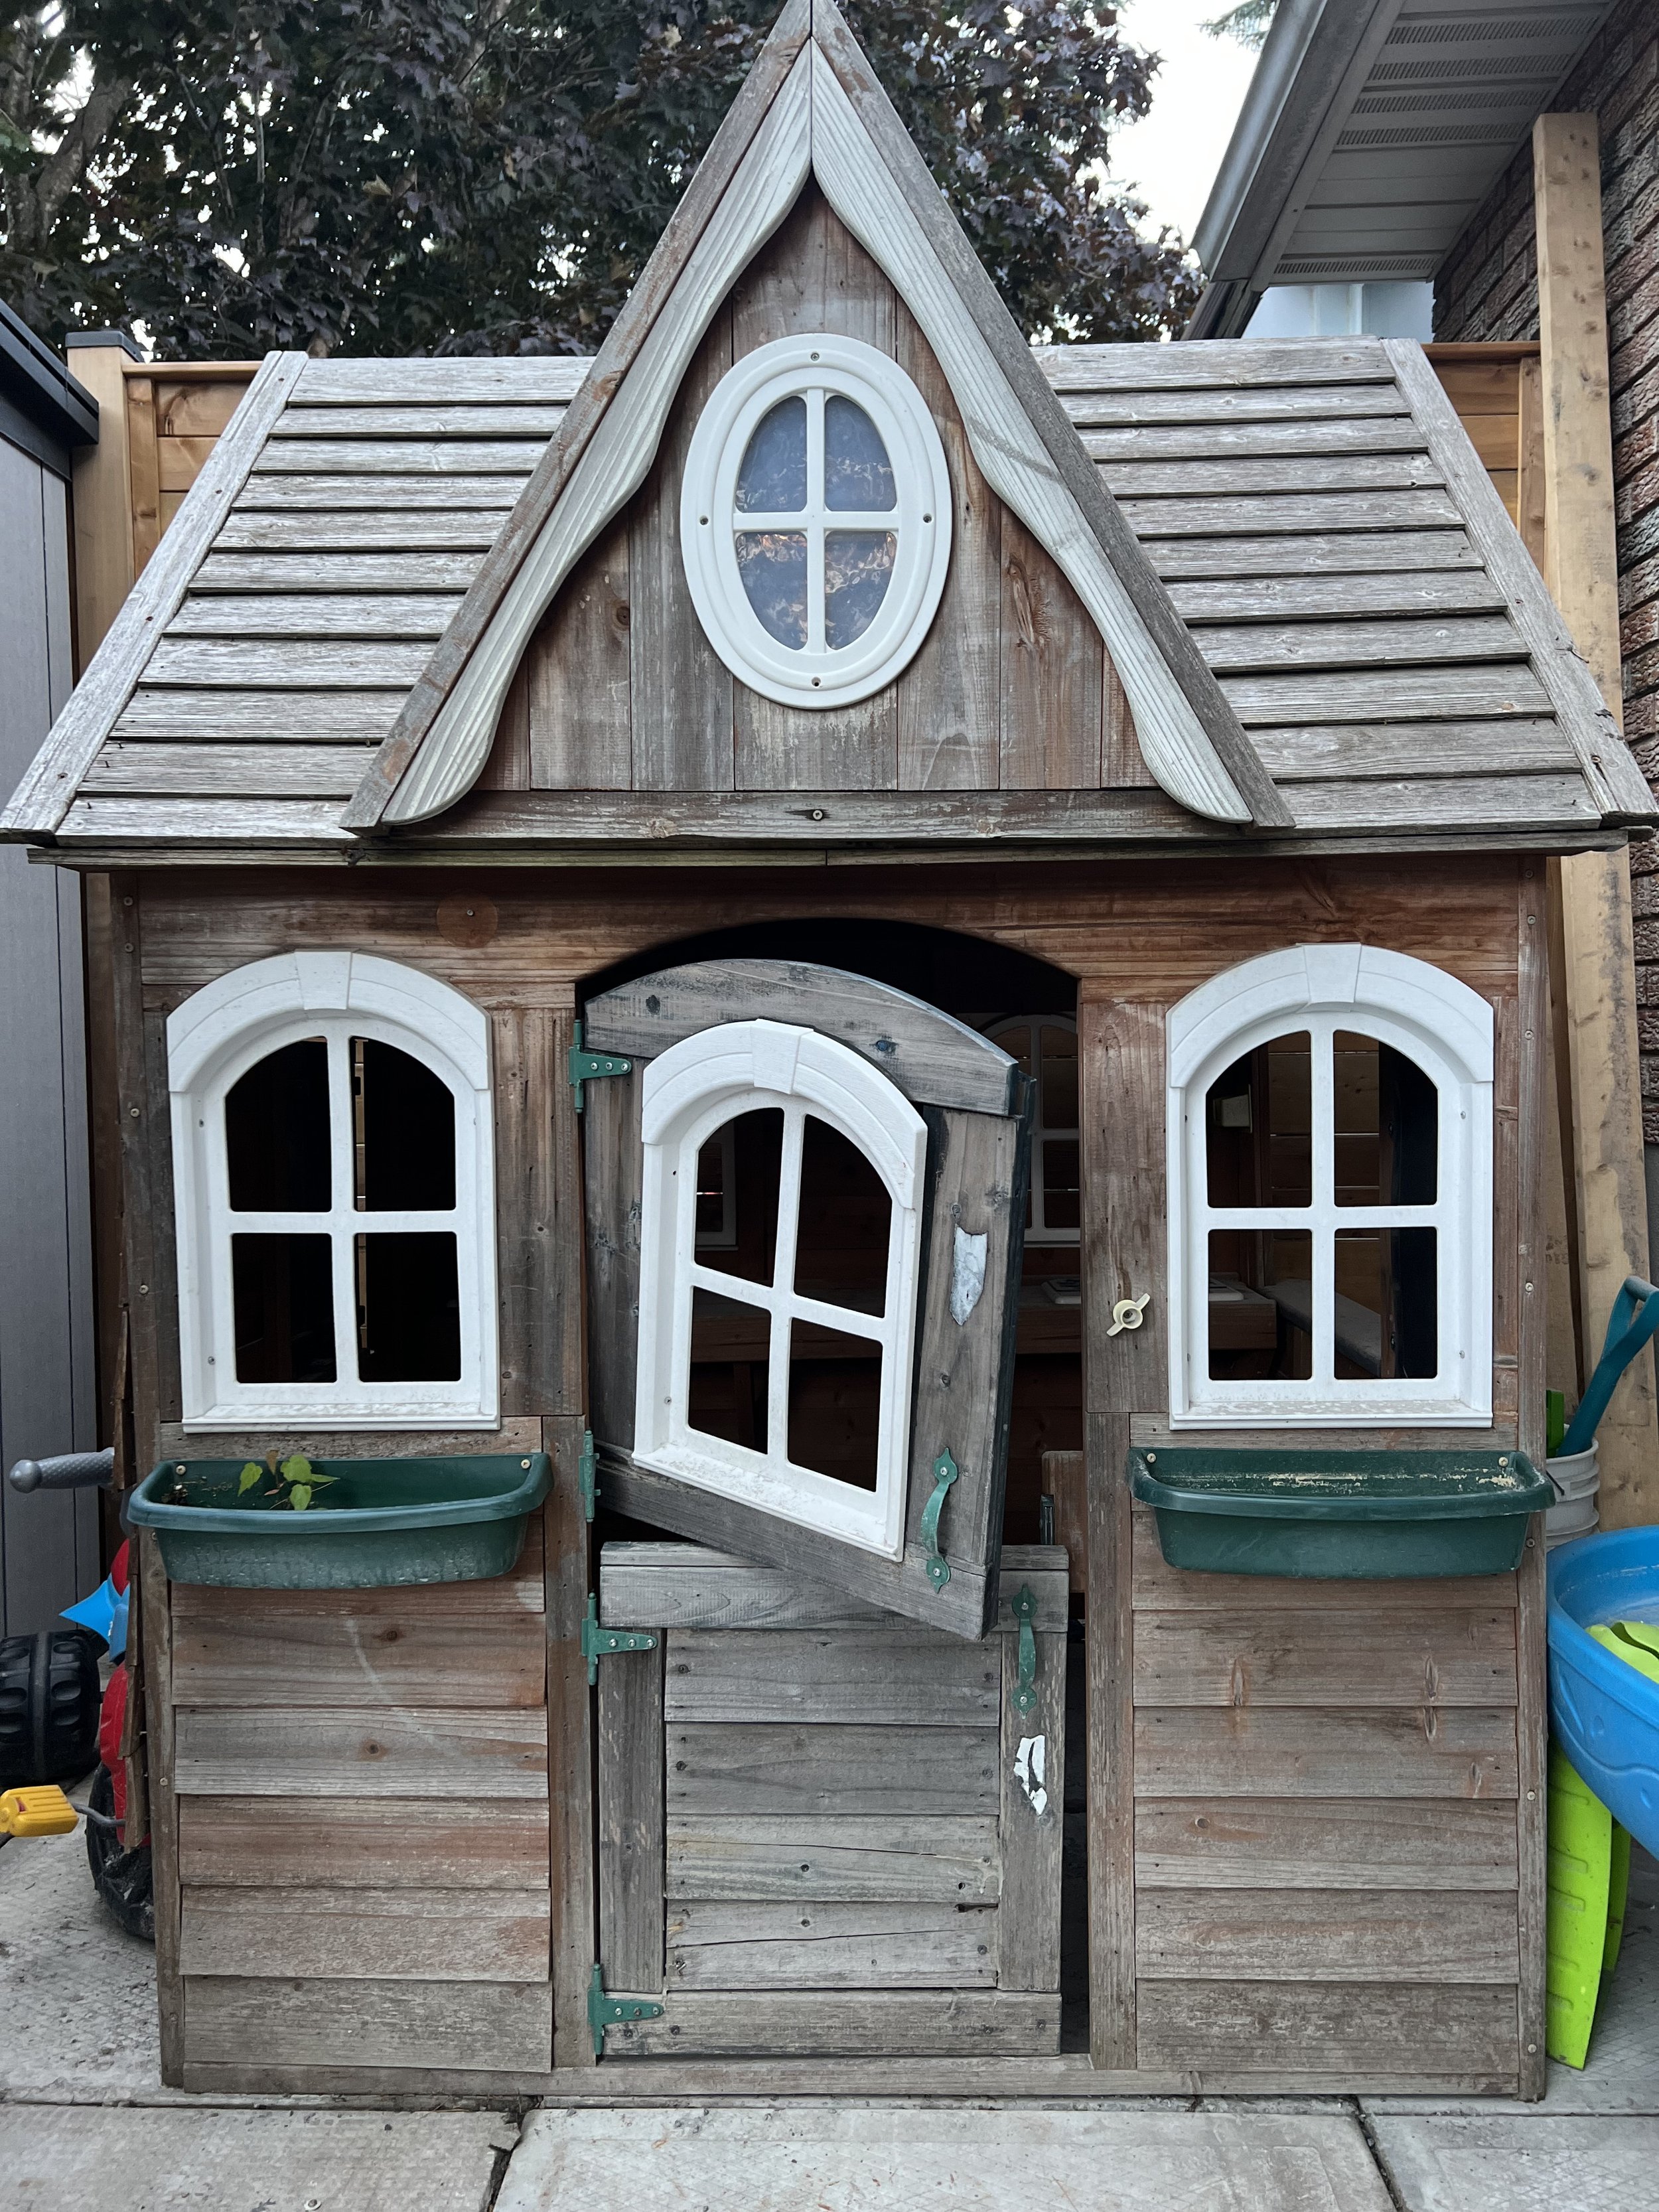
Playhouse: of course you will first need a playhouse to makeover! Check online listings, Facebook MarketPlace, or community groups to see who has one they are willing to part ways with. We got ours from my aunt and she was shocked when I showed her the transformation.
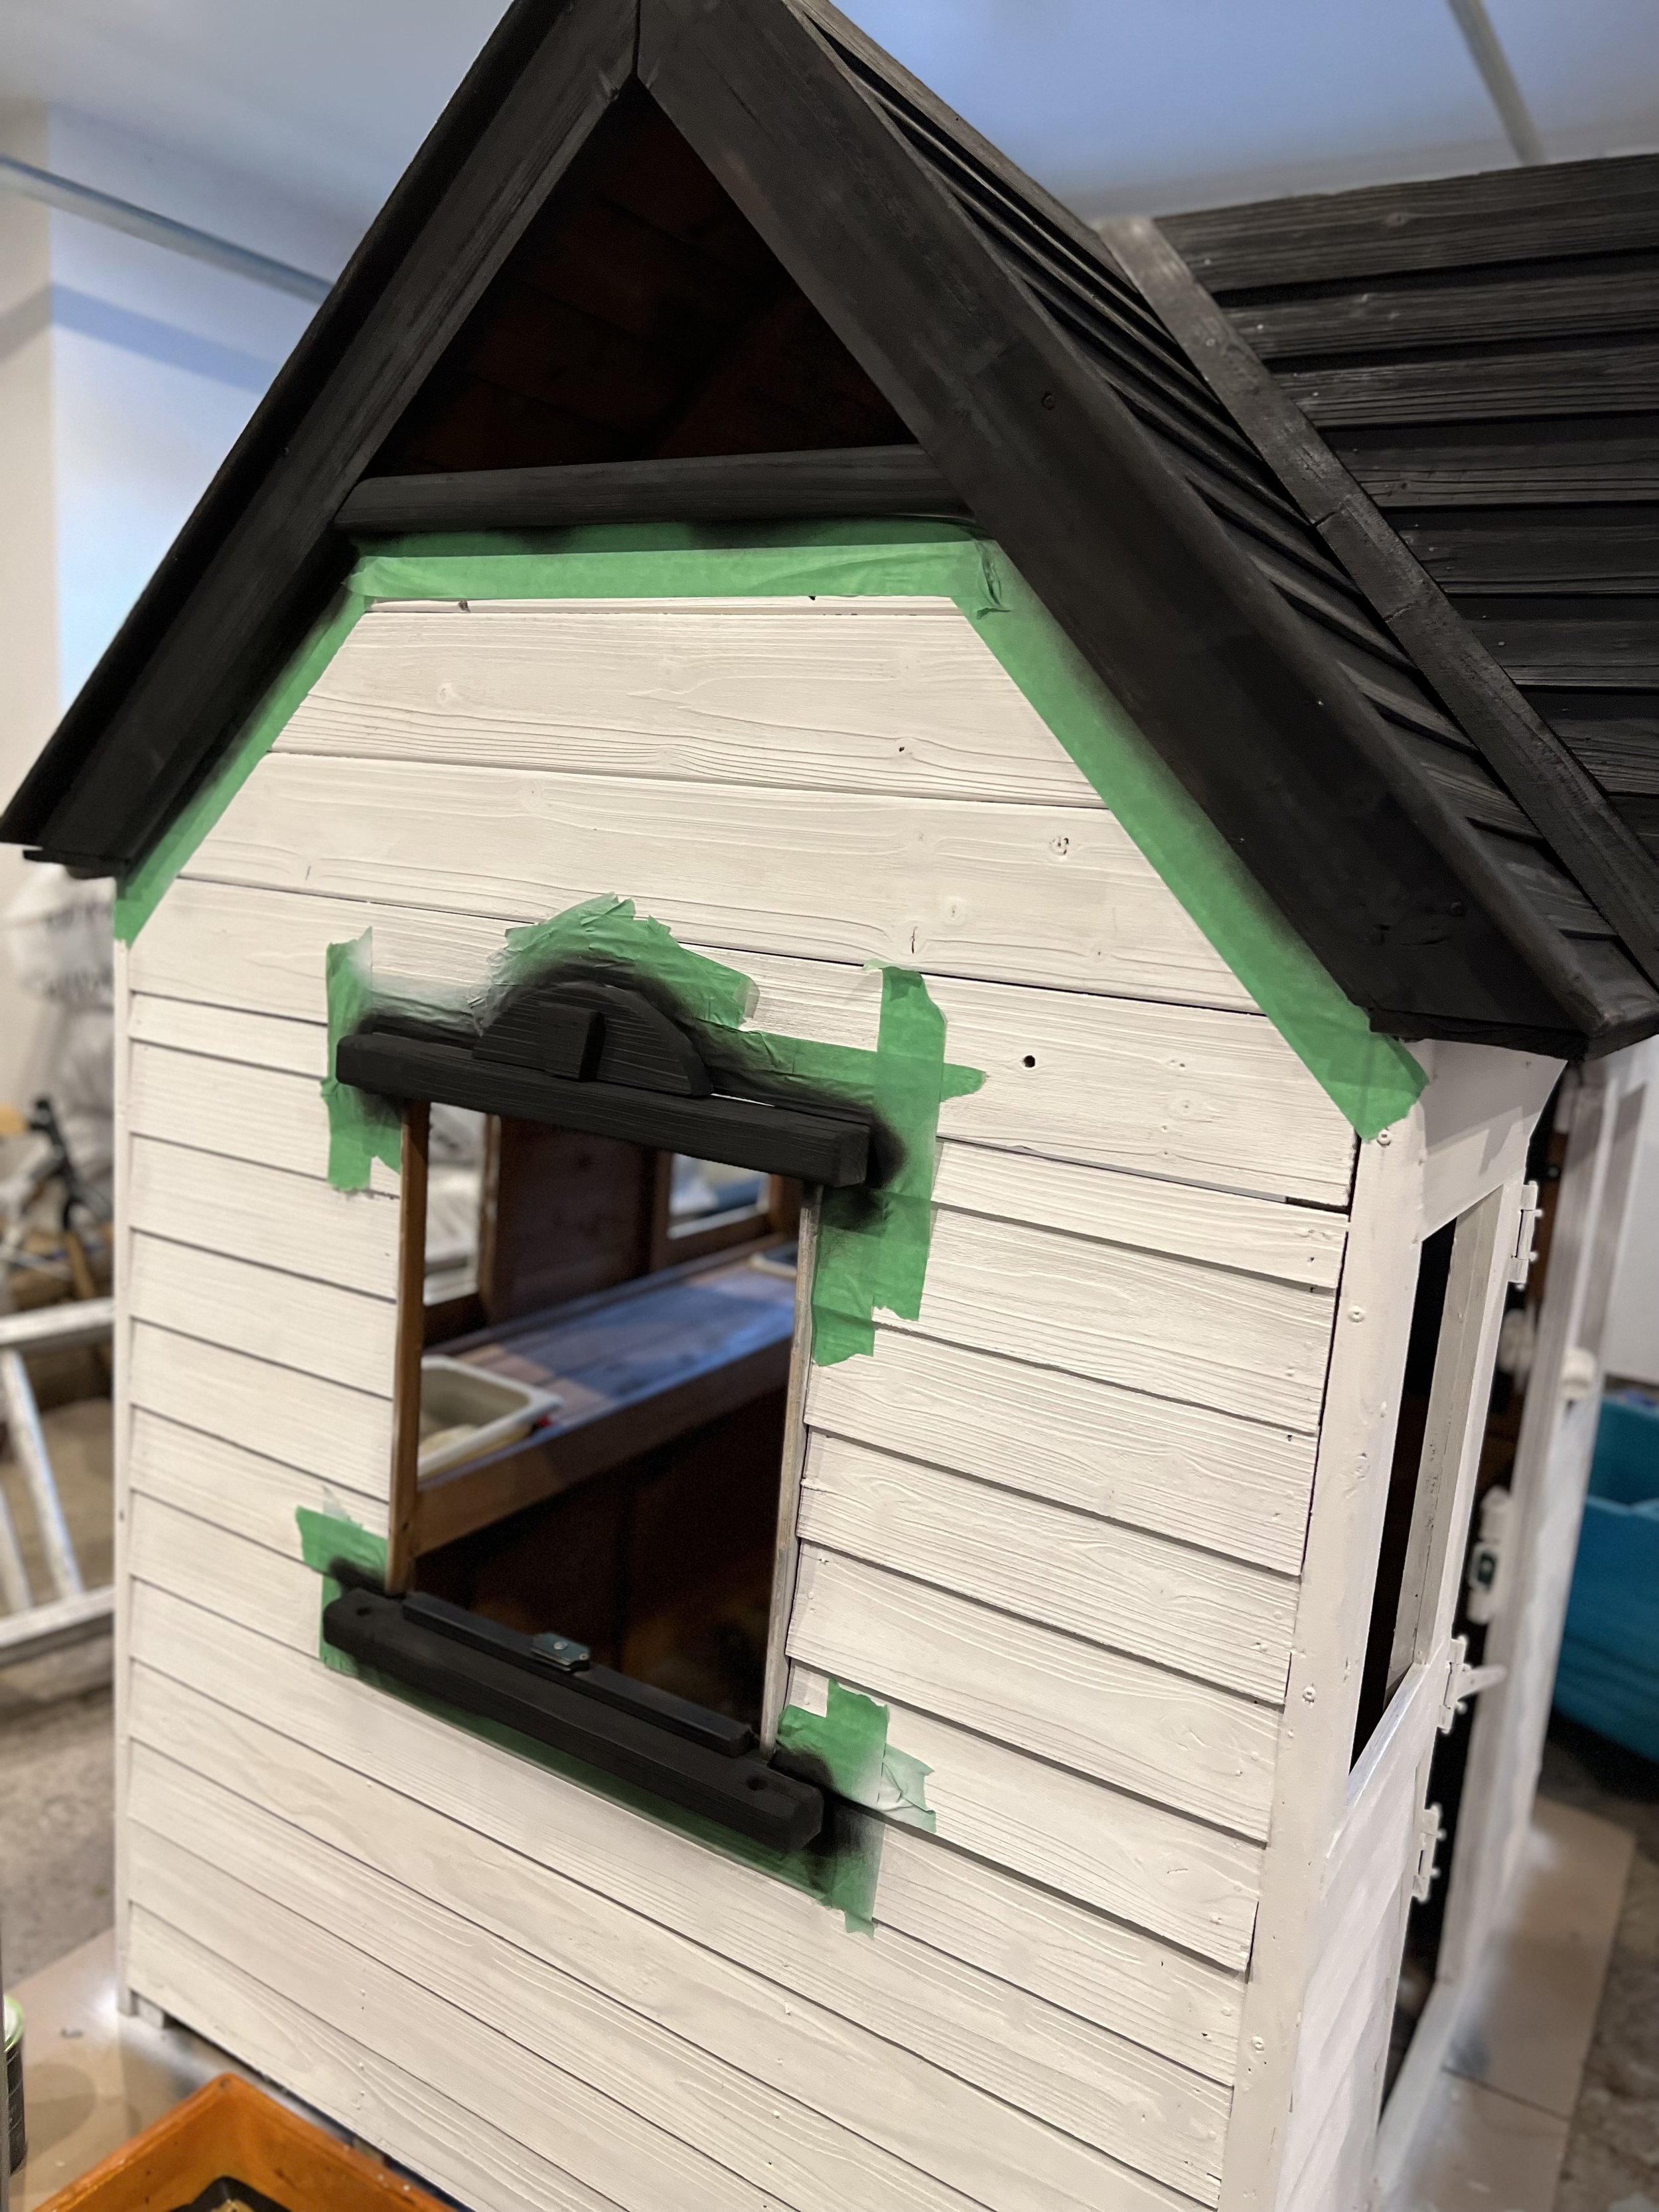
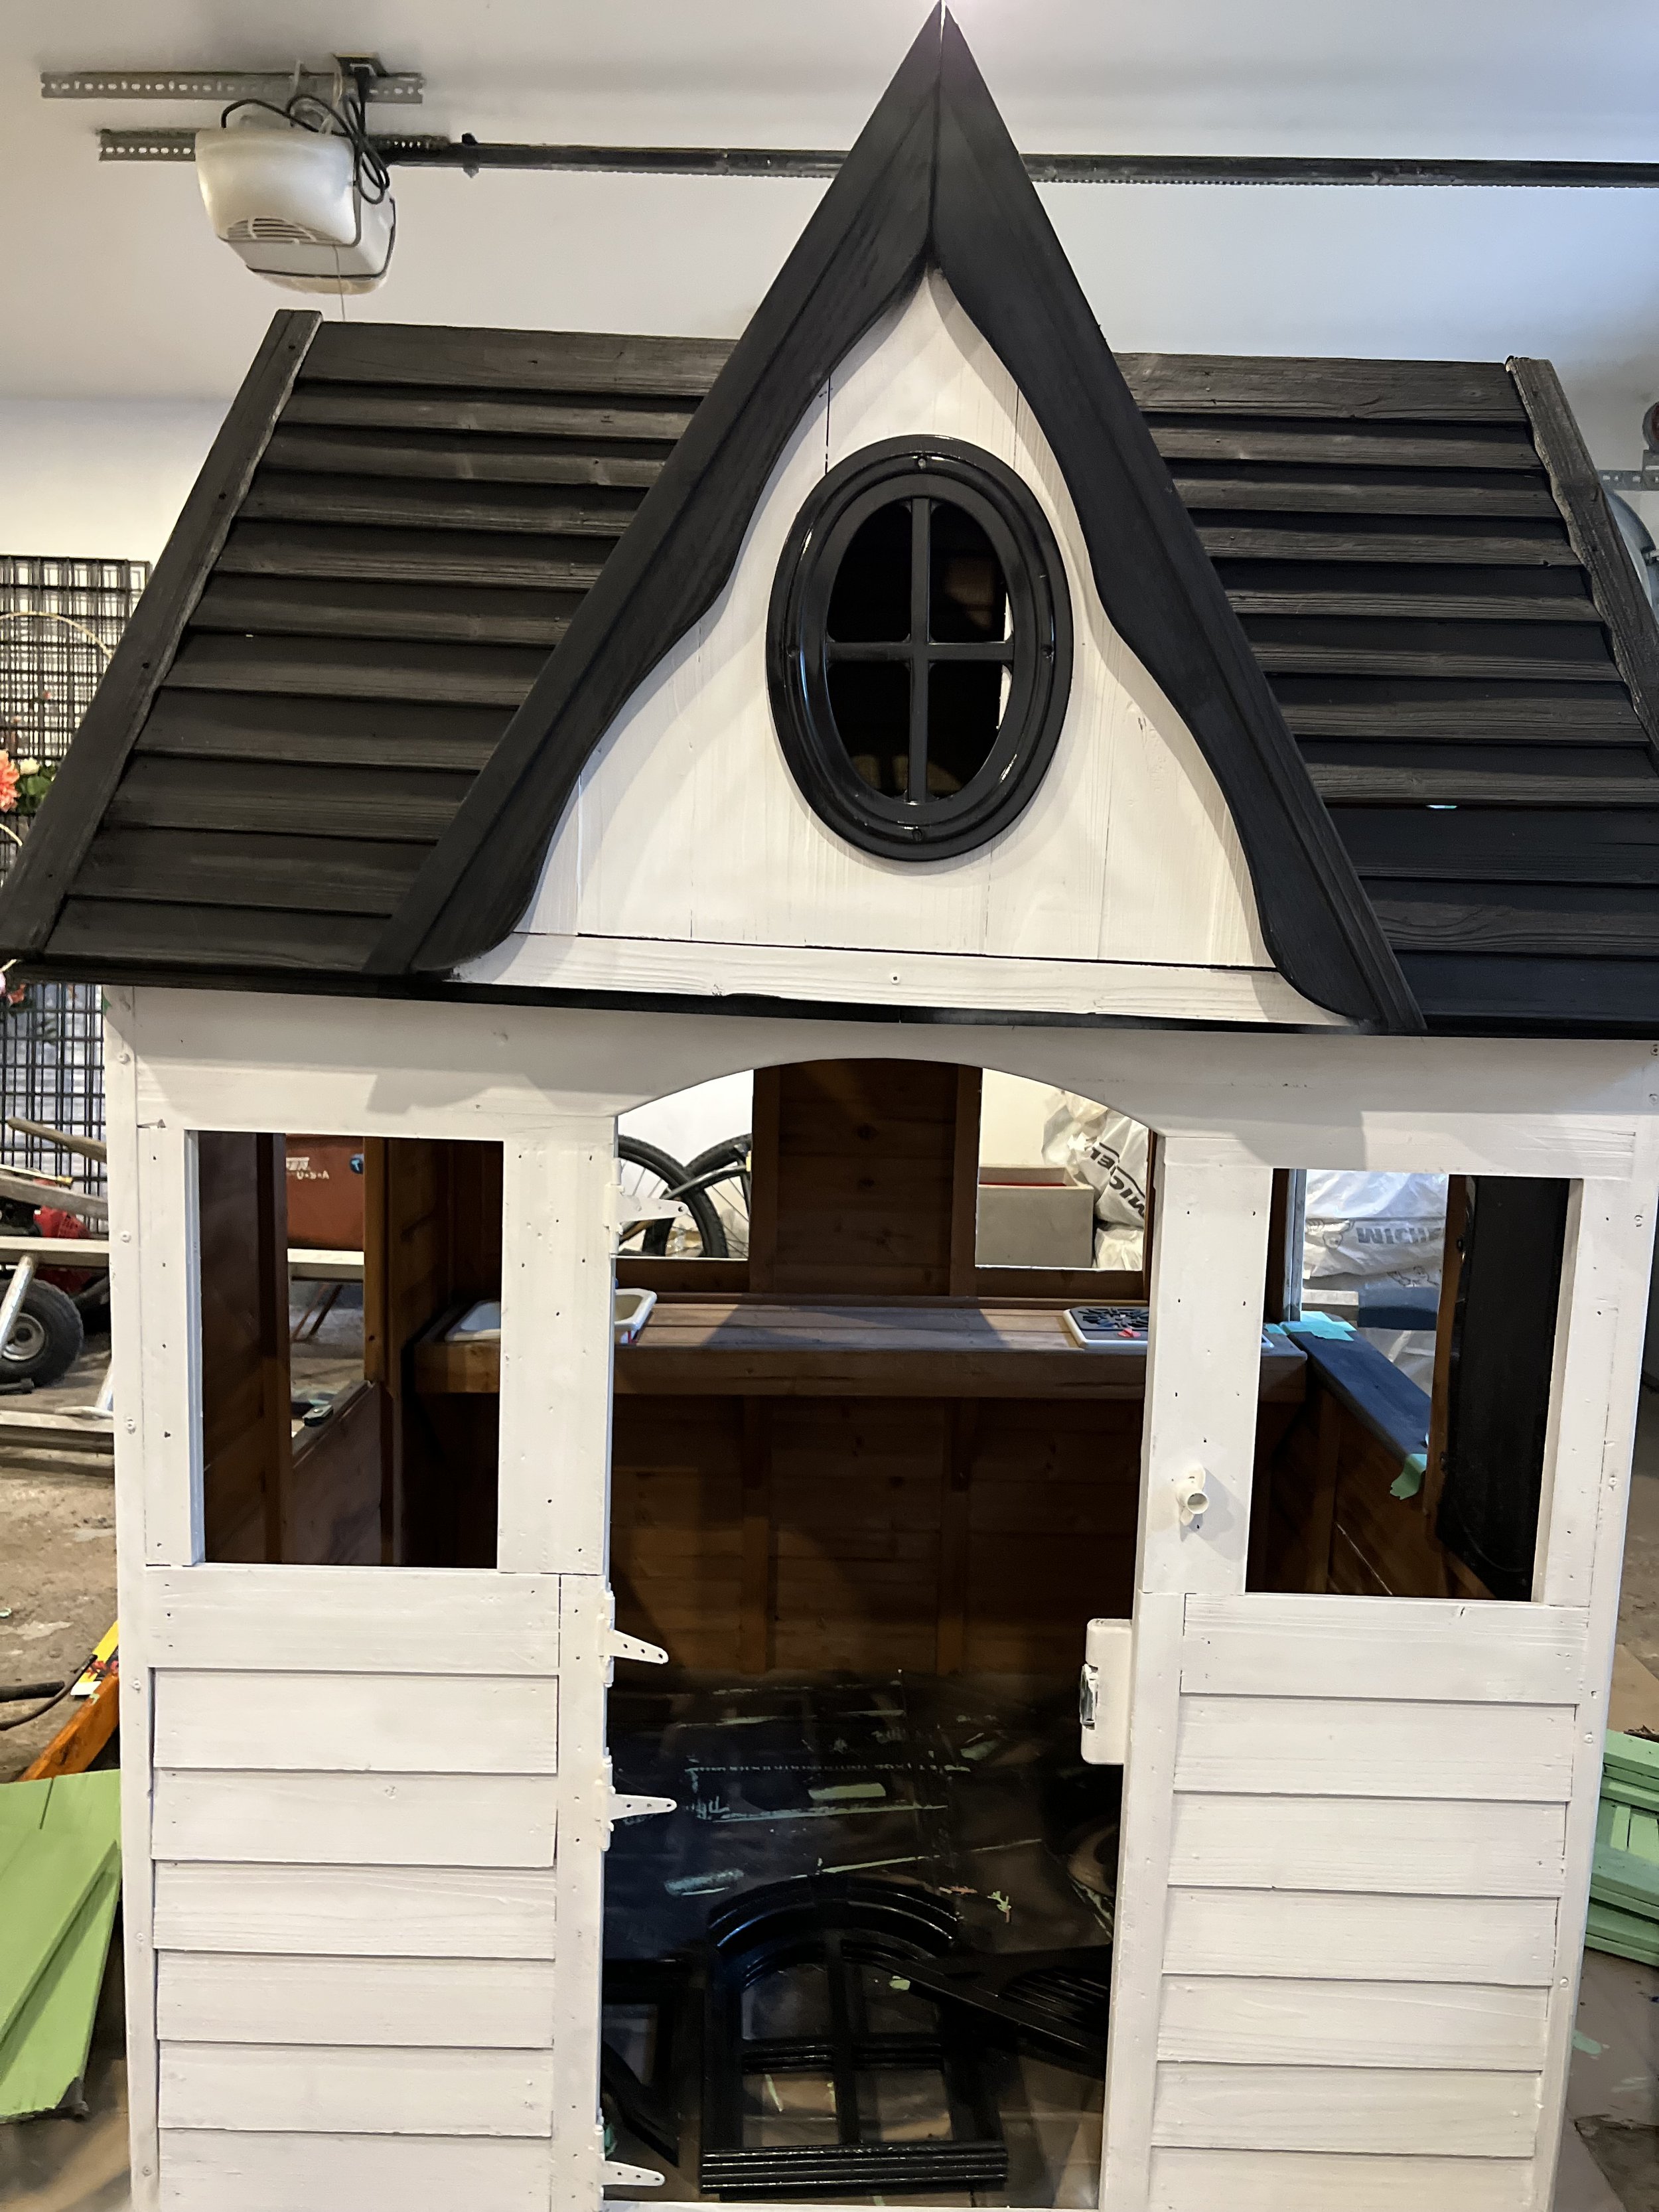
Paint: Opt for outdoor paint in vibrant colours to breathe new life into the playhouse. I chose a crisp white for the main play house and used black for the windows and roof. Make sure to add a pop of colour for that vibrant touch. I went with an avocado green shade, after all, green is my favourite colour!
Faux Florals: Grab a bunch of artificial flowers and greenery. These lifelike beauties will add a touch of nature without the hassle of maintenance.
Dry Foam: I used dry foam to easily stick the branches of the Faux Florals into the flower boxes. If you are using real flowers, simply pickup some dirt and have at it!
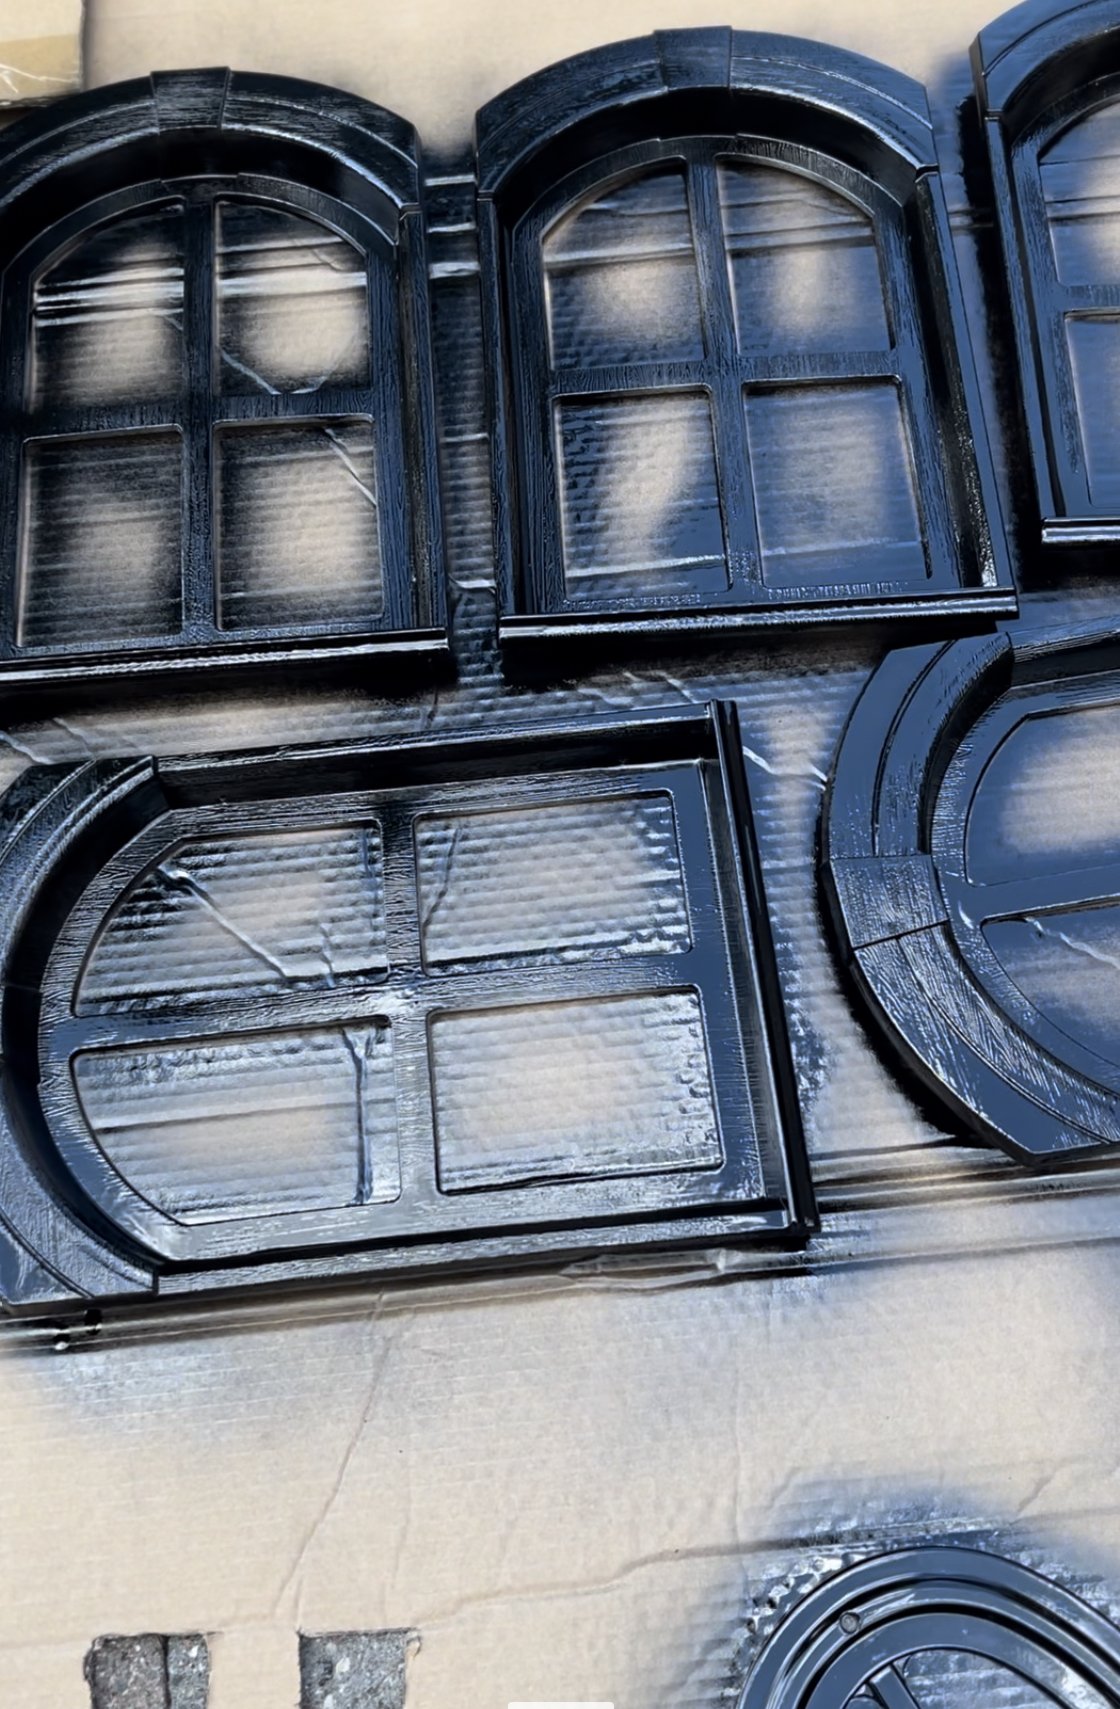
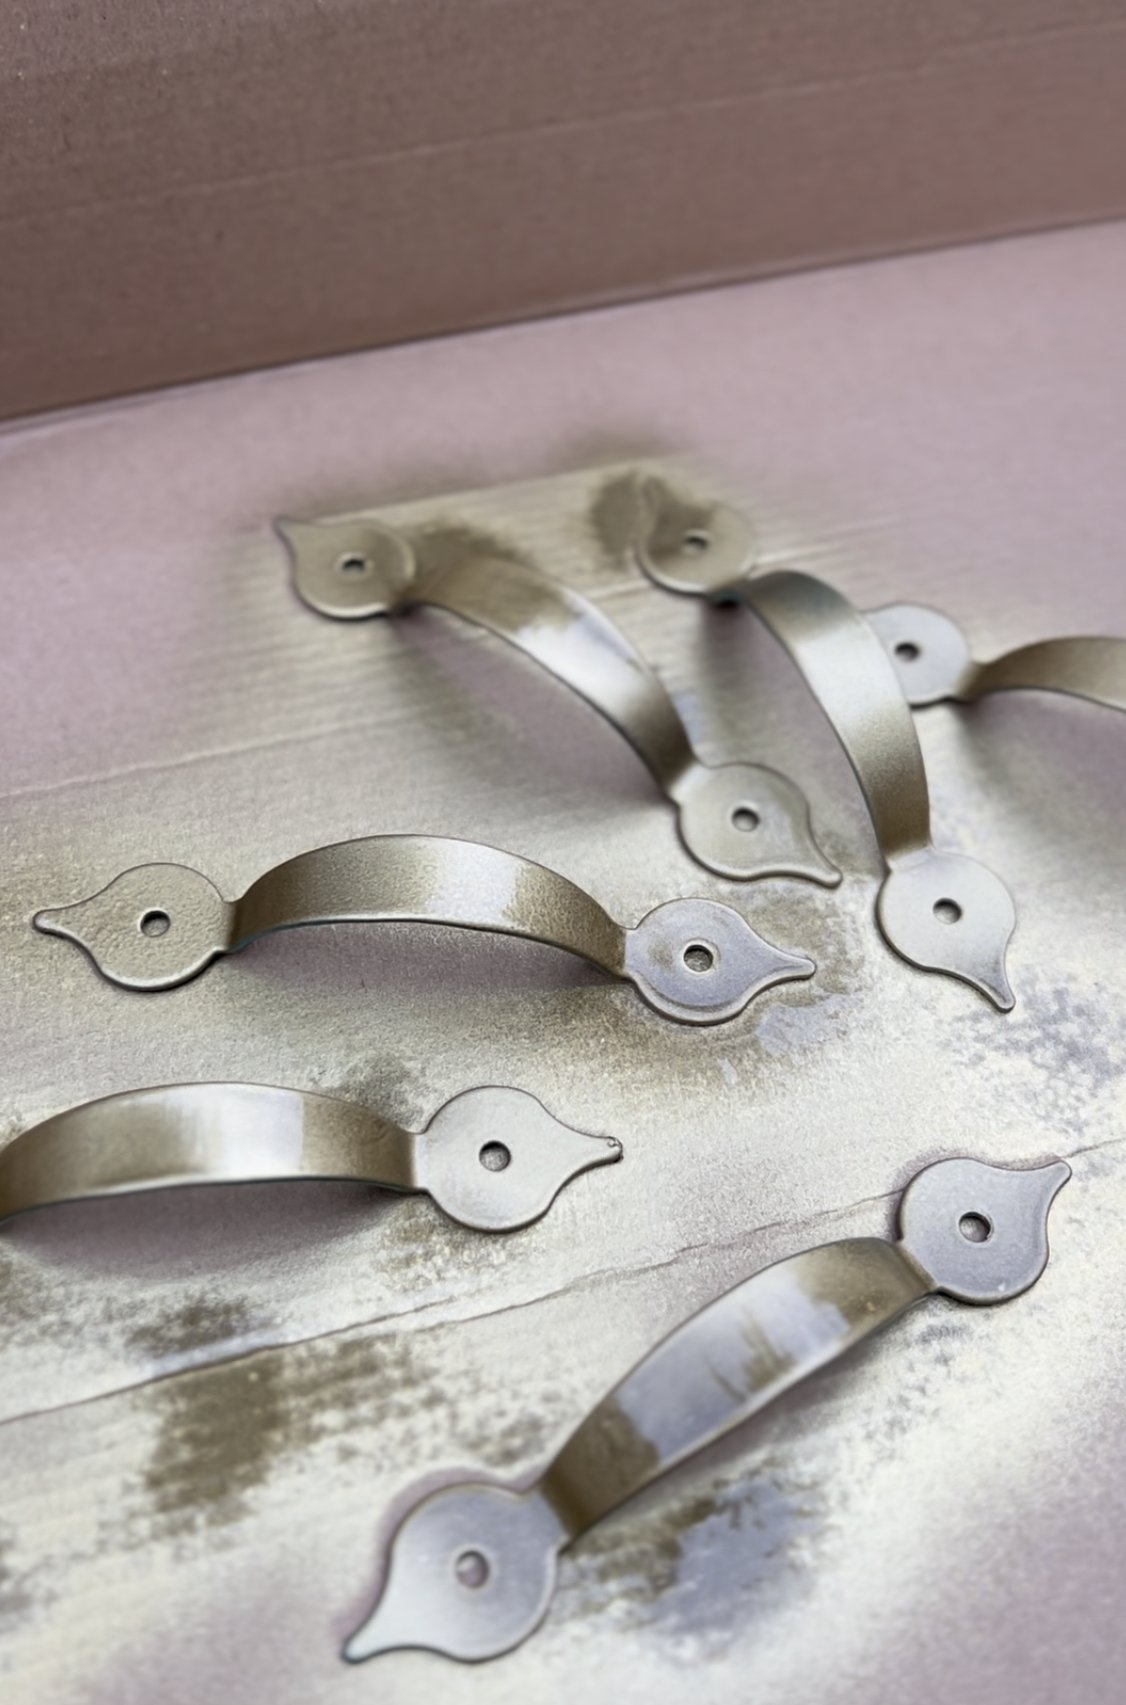
Spray Paint: I quickly realized using spray paint for the windows and handles was the was to go. Select colours that complement your overall playhouse theme. I went for a shiny gold spray paint for a touch of glamour and used this for all the handles.
Painters Tape: This is important to make sure the paint only gets onto desired areas.
Tools: Don't forget your trusty toolkit! Whether you are raiding daddy’s tool shed or grabbing some of your own possessions, make sure you have all the essentials like paintbrushes, rollers, a ladder (if necessary), screws, drill, and a hammer for any repairs or installations. Sand paper can also come in handy if the playhouse is in rough condition.
Wood: Depending on your play houses condition, you may need some extra wood boards when it comes time to repairing the house. We had some boards missing in the roof!
Chalkboard and Accessories: A chalkboard is an essential supply for the playhouse makeover, allowing for endless creative expression and imaginative play. It provides a versatile space to write sweet messages, draw pictures, or play educational games. I also added a delightful collection of kitchen bowls and play food to bring the kitchen to life.

The Makeover Process
As busy moms, we understand that time is a precious commodity. That's why I tackled this playhouse makeover in small, manageable increments. Let's break down the process into easily digestible steps:
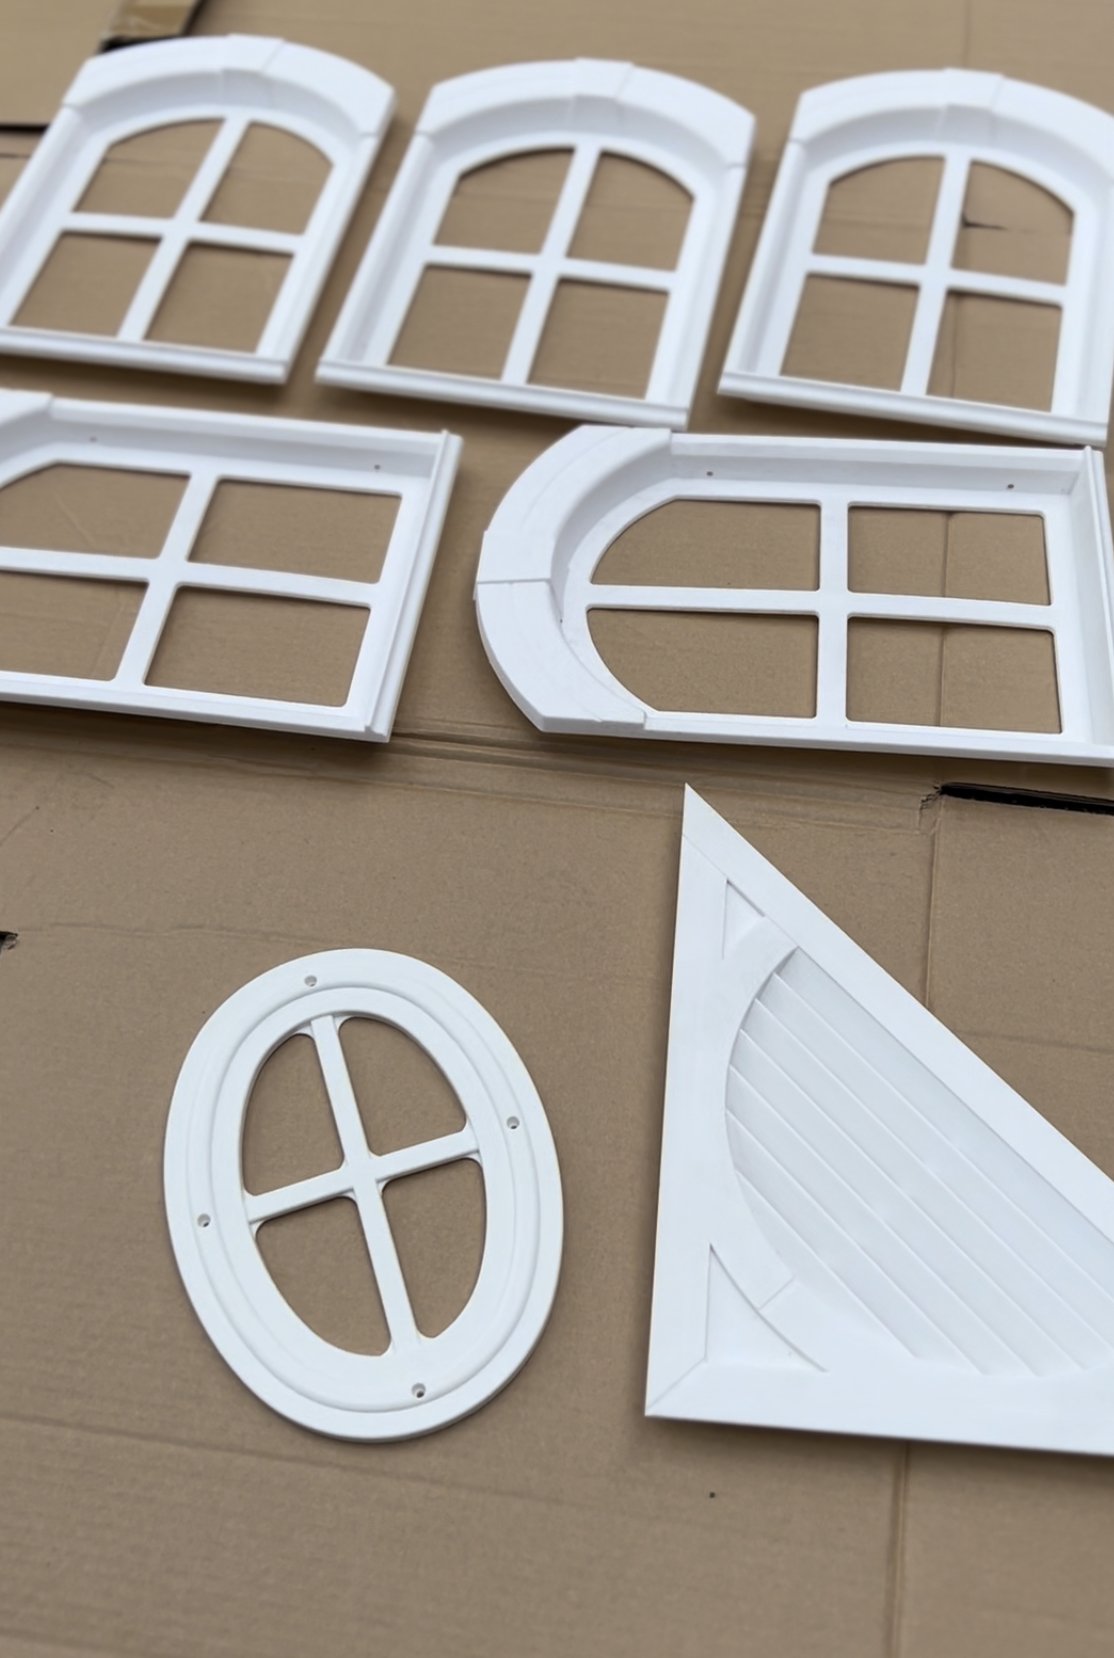
Assess and Clean: Begin by assessing the playhouse's condition. Clean off the accumulated dirt, the many cobwebs, and remnants of their last mud pie adventure. I found unscrewing all the windows, hosing them down and then tossing them into either the dishwasher or a sink full of bubbles worked magically. Trust me, a clean slate is essential!
Repairs and Prep: Fix any broken windows or loose boards. Safety first, mamas! Our play house had a few boards on the door and roof which needed replacing. A simple trip to the hardware store allowed us to ensure no boards were missing. It is also important to make sure you sand down any rough edges and ensure everything is secure before moving forward. No one wants a missing board or sliver while playing.
Remove Windows & Doorknobs: You likely would have done this in the cleaning step but if not, make sure you remove all windows and door handles from the playhouse. This will make it easier to paint for a fresh clean look.
Add Splash of Colour: Let the paint do its magic as you transform the playhouse walls! Remember, we're not in a sprint here—slow and steady wins the race (and avoids those unintentional paint splatters on your clothes!). I began this vibrant journey by giving the playhouse walls a fresh coat of white paint, creating a clean canvas ready for a burst of creativity. Next up, I used painters tape to ensure I was only painting the designated areas. Then, it was time to tackle the roof, layering a fresh coat of paint truly transformed the house.
Once the foundation was set, I unleashed my spray paint skills on the windows and handles. The spray paint truly worked wonders, adding a touch of pizzazz that even Picasso would applaud. And let's not forget the grand finale—the playhouse door and the adorable flower baskets. With a delightful shade of light green, the door beckoned kids to step into a world where dreams take flight, while the flower baskets proudly displayed their colorful blooms, even if they were just a faux floral fantasy. Don't underestimate the power of a little paint to elevate the playhouse from drab to fab!
Let Nature Blossom: Now it's time to bring a touch of enchantment with those mesmerizing faux florals! Oh, let me tell you, the flower baskets were my absolute favourites and exceeded all expectations. I started by placing dry foam into the baskets. Then using my wire cutters I cut down the florals to the perfect height and started sticking them into the foam. The florals blossomed into a magical sight that even the most skilled gardeners would envy. Those artificial blooms worked their wonders, transforming the playhouse into a vibrant garden of endless joy for our little ones, no watering can required!
Personalize the Space: Hang their artwork or a chalkboard on the walls. I opted for a chalkboard and couldn't resist writing sweet messages that melted my heart. But oh, it didn't take long for those tender words to be erased, making way for a gallery of delightful doodles and whimsical drawings.
I also got some outdoor kitchen play items for the play house. Some wooden spoons, bowls and fake food the kids transformed into little chefs, cooking up a storm of imaginative dishes that would make Gordon Ramsay raise an eyebrow.
BONUS: Let There Be Light: Find a spare moment to install child-safe lighting fixtures. Battery-operated LED lights are practical and whimsical, casting a warm glow over their playhouse adventures.


Dear fellow moms, let me assure you that embarking on a playhouse makeover is not only worthwhile but also surprisingly achievable, even with the busiest of schedules. As parents, we yearn to create a world of magic and wonder for our little ones, and this DIY project allows us to do just that. The beauty of it lies in its flexibility—from a few minutes a day or an hour, you can make progress, one step at a time. With each brushstroke and spritz of paint, I could see the transformation unfolding before my eyes. The sense of accomplishment that comes from creating a special space for our children is truly unmatched.
Now, let's fast-forward to the moment my kids laid eyes on their revamped playhouse. The joy that lit up their faces was beyond words and brought tears to my eyes! From playing house in their miniature kitchen to hosting imaginary tea parties, their imaginative play knew no bounds. The vibrant colours, cozy areas, and personalized touches ignited their creativity in ways I couldn't have imagined.
So get those paintbrushes ready and I encourage you to give this a try and unleash your inner DIY powers and create a playhouse that will be cherished for years to come.
Happy crafting, super-moms!
For more ideas, follow me @unstoppable.mama
